Oh, friend, do you ever get that craving for something that’s just perfectly crunchy, a little tangy, and bursting with fresh flavor? Something that reminds you of those simple, sunny days, perhaps a picnic in the park or a casual backyard barbecue? Well, let me tell you, these Pickle Pepper Snack Jars are about to become your new favorite secret weapon for tackling those snack attacks! They’re ridiculously easy, whip up in a flash, and honestly, they’re so vibrant and tasty, they’ll make your taste buds sing. Forget complicated recipes; this is pure, unadulterated snack joy, ready when you are.
Why You’ll Love Pickle Pepper Snack Jars
- Fast: Seriously, we’re talking minutes of prep time!
- Easy: No cooking required, just chop, layer, and pour.
- Giftable: Pop a cute ribbon on top, and you’ve got the most charming hostess gift!
- Crowd-pleasing: Everyone loves a good pickle, and these add a fun twist.
- Healthy & Hydrating: A crisp, refreshing snack option.
Ingredients
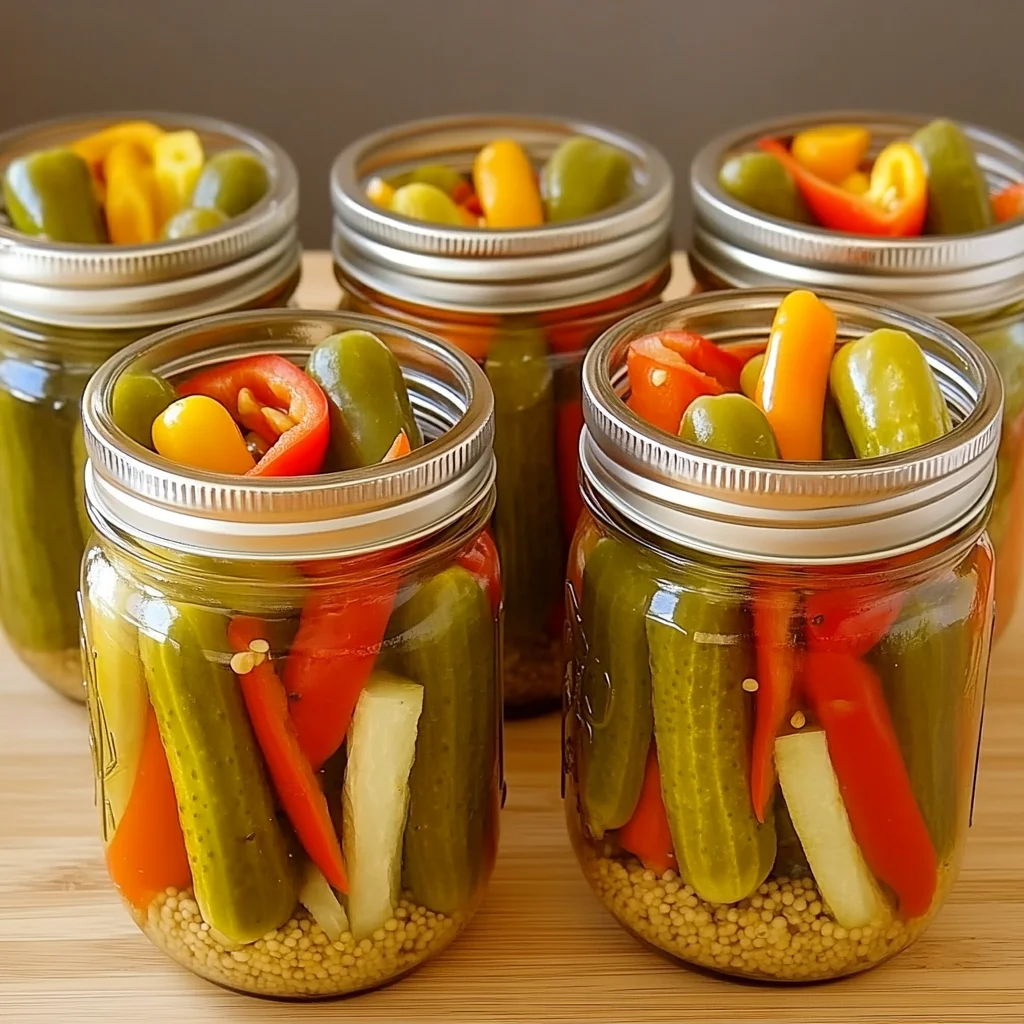
Gather ’round, because this ingredient list is as short and sweet as a summer day. You probably have most of these on hand already!
- 1 cup dill pickle spears, cut into chunks: The star of our show! I love a good crunchy dill, so pick your favorite brand. Cutting them into chunks makes them easier to layer and eat.
- 1/2 cup mini sweet peppers, sliced: These add a lovely sweetness and a pop of color without any heat.
- 1/2 cup baby carrots: For that classic crunch and touch of natural sweetness.
- 1/2 cup cauliflower florets: They soak up all that wonderful pickle brine like a dream and add fantastic texture.
- 1 cup pickle brine (from the jar): Don’t toss that liquid gold! It’s the flavorful base that brings all these veggies together.
How to Make Pickle Pepper Snack Jars
Get ready for the easiest recipe you’ve made all week! Seriously, it’s almost too simple to be true, but the results are oh-so-delicious.
- Prep Your Jars: First things first, grab a few clean, small jars. Mason jars are perfect, but any clear, sealable jar will do! This recipe is great for making individual servings or one larger jar for sharing.
- Layer Up the Goodness: Start layering your veggies into the jars. I like to alternate the colors for a pretty presentation. Begin with a layer of your dill pickle chunks, then add some sliced mini sweet peppers, followed by baby carrots, and finally, those lovely cauliflower florets. Repeat until your jars are nicely filled, leaving a little space at the top. This layering technique isn’t just for looks; it ensures an even distribution of flavor. If you’re looking for other amazing jar-friendly ideas, you might love making an easy zesty Italian tuna pasta salad!
- Pour in the Brine: Carefully pour that precious pickle brine over your layered vegetables until they are completely covered. You want every piece to be submerged so it can soak up all that tangy goodness.
- Seal and Chill: Securely seal the jars with their lids. Now, here’s the hardest part (and it’s not even hard!): place your jars in the refrigerator for at least 2 hours. This chilling time is essential, as it allows all those vibrant flavors to meld and develop, transforming plain veggies into zesty, pickled perfection. While you wait, why not explore more delicious Crispy Kitchens recipes for your next meal?
- Serve Chilled: Once they’re thoroughly chilled and the flavors have had a chance to get acquainted, pull them out and enjoy! They’re perfect served directly from the jar as a snack, or alongside your favorite sandwich. They also make a fantastic appetizer for parties – maybe even with some cheesy BBQ bacon bombs!
Substitutions & Additions
This recipe is super flexible! Feel free to get creative with what you have on hand or what you love.
- Veggies: Try adding sliced cucumber, cherry tomatoes, pearl onions, green beans, or even small broccoli florets. Just make sure they’re firm and can stand up to the brine.
- Spice It Up: A pinch of red pepper flakes or a few thin slices of fresh jalapeño can add a lovely kick.
- Herbs & Aromatics: Fresh dill sprigs, garlic cloves (sliced or minced), or a few bay leaves can infuse extra flavor into your brine.
- Vinegar Boost: If your pickle brine isn’t quite strong enough, you can add a splash of white vinegar or apple cider vinegar to the mix.
Tips for Success
Making these snack jars is pretty foolproof, but a few little pointers can make them even better!
- Jar Size Matters: For individual snacks, small 8-12 oz jars are ideal. If you’re making a batch for a party, a larger quart-sized jar works wonderfully.
- Pack ‘Em Tight (But Not Too Tight!): You want a good amount of veggies in each jar, but make sure there’s enough space for the brine to circulate and for the flavors to penetrate.
- Don’t Rush the Chill: While you can eat them after an hour, giving them the full two hours (or even overnight!) really makes a difference in flavor development. Patience is a virtue, especially when deliciousness is involved!
- Mix and Match Brine: Feel free to experiment with different pickle brines. Spicy dill pickle brine will give you a different kick than a sweet gherkin brine.
How to Store Pickle Pepper Snack Jars
These jars are built for make-ahead convenience!
- Refrigeration is Key: Always keep your Pickle Pepper Snack Jars sealed and refrigerated.
- Shelf Life: They will stay fresh and delicious for up to 5-7 days in the refrigerator. The veggies will get softer over time, but the flavor will remain fantastic.
- Best Enjoyed: I find they’re at their absolute best within the first 3-4 days when the veggies are still wonderfully crisp.
FAQs
Got questions? I’ve got answers!
Q: Can I use fresh brine instead of pickle brine from a jar?
A: Absolutely! You can make a simple brine with equal parts water and white vinegar, a tablespoon of salt, and a teaspoon of sugar, plus any seasonings you like (dill, garlic, peppercorns). Bring it to a boil, then let it cool completely before pouring over your veggies.
Q: How long do the vegetables need to “pickle” for the flavors to develop?
A: At least 2 hours is great, but overnight or even 24 hours will give you the most intense and melded flavors. The longer they sit, the more pronounced the “pickled” taste will be.
Q: Can I use different types of peppers?
A: Yes! Bell peppers (any color) cut into strips work well. If you like a little heat, a few slices of jalapeño or serrano peppers would be fantastic!
Q: Are these truly “pickled” or just marinated?
A: These are a form of “quick pickles” or “refrigerator pickles.” They aren’t fermented like traditional pickles, but they absorb the tangy, salty, and savory flavors of the brine, giving them that wonderful pickled taste and texture.
For more delicious recipes and kitchen inspiration, be sure to follow us on Pinterest!
Mama's Speedy Pickle Pepper Snack Jars
Ingredients
Equipment
Method
- Step 1: Grab a few clean, small jars (Mason jars or any clear, sealable jar) suitable for individual servings or a larger jar for sharing.
- Step 2: Layer the prepared veggies into the jars, alternating colors for presentation. Start with dill pickle chunks, then add sliced mini sweet peppers, baby carrots, and cauliflower florets. Repeat layers until jars are nicely filled, leaving a little space at the top.
- Step 3: Carefully pour the pickle brine over the layered vegetables until they are completely submerged.
- Step 4: Securely seal the jars with their lids and place them in the refrigerator for at least 2 hours. This chilling time is essential for the flavors to meld and develop.
- Step 5: Once thoroughly chilled, serve the snack jars directly from the jar as a snack, alongside your favorite sandwich, or as an appetizer.